Multimedia Process Document
Introduction
For this task I created a video to show my students how to navigate the course I will be creating for them. I decided to talk about the navigation images I created for task 2. I felt a short introduction video to explain the navigation icons for the course would help students understand where they can find the various areas of the course.
The audience is adults, ranging in age from mid-thirties to mid-sixties, that teach college level courses. Their education level ranges from Masters to PhD. I plan to use the graphic navigational items for my capstone project. This project will be to teach a course to fifteen to twenty transitional study faculty at a community college.
Software
The tool I selected to use is Camtasia 2 for Mac by TechSmith. The reason I chose this application is because of the years of experience I have with it. I have used this application to develop tutorial videos for faculty and students for the past three years. Most recently I have used this application to create bi-weekly video blog for the ERP project I am managing.
Design Process
I started my design process by developing a flowchart of how I wanted to progress through the video (Fig. 1).
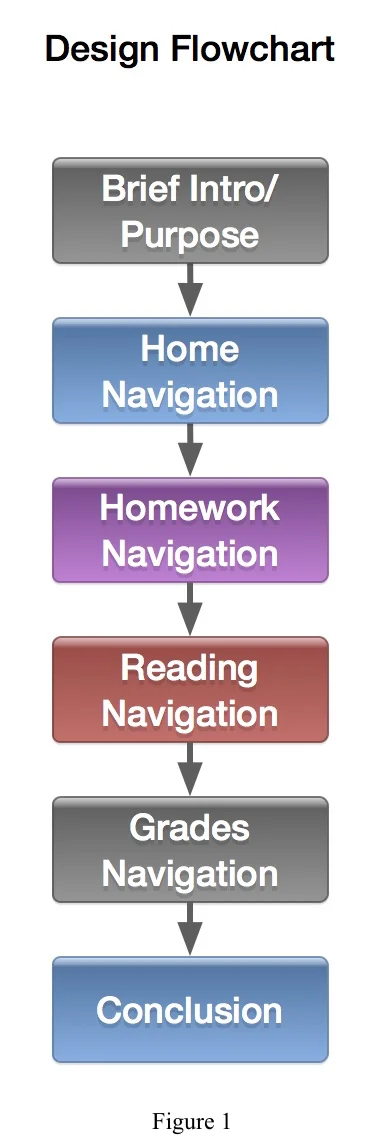
I decided to start with a short introduction to the video then move through the list of navigation icons: Home, Homework, Readings and Grades. I then added a short conclusion. This flowchart was helpful in keeping me focused during the recording of the video. Without this chart it would have been easier to stray from the desired flow for the video.
Creation Process
Before I started on the creation of the video I decided to draft the design flowchart to help me with the flow of the video (Fig. 1). I made sure to have a copy of the flowchart visible during the recording process to make sure I stayed on track.
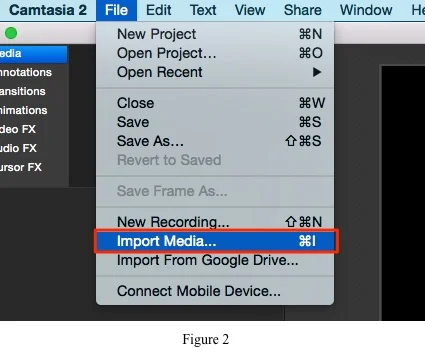
To start the video creation process I launched the Camtasia 2 app on my MacBook Pro. Before I started recording I pulled in my navigation icons into the media library so I could use them with the recording (Fig. 2).
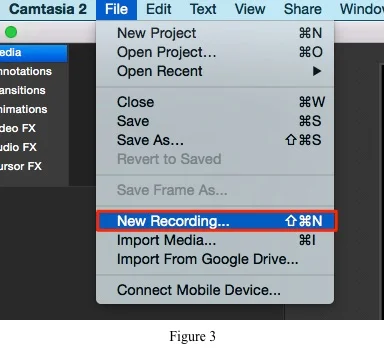
Once all my images were loaded into the media bin then I initiated the recording process, choosing the option to capture the web cam only (Fig. 3).
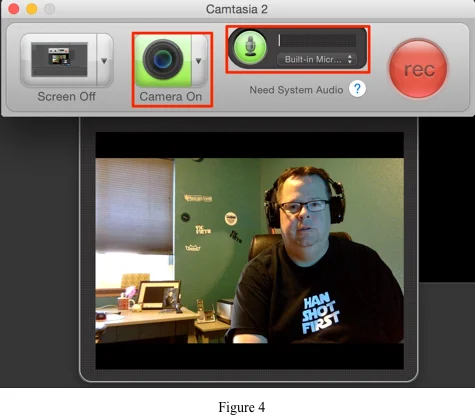
In most Camtasia recordings I include the screen in addition to the web cam because I am usually demonstrating a website or application. In this video I was interested in showing some graphics I had created instead of an application so I really only needed the webcam and microphone (Fig. 4).
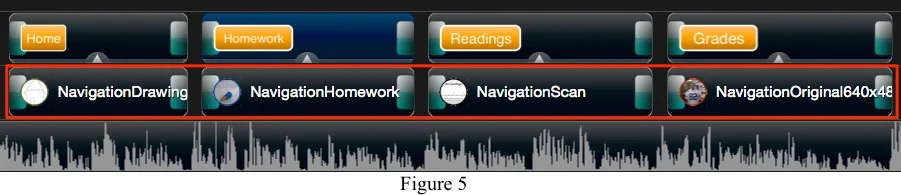
At this point I just needed to hit the record button to start the recording process. For the recording process I just ran through my flowchart items and talked about the various graphics and how they were going to be used for navigating the course. This is where acting comes in because you have to kind of imagine the finished product, like where graphics will be placed on the screen and the overall structure of the final video. Once the recording is complete then the challenge of post-production begins. Fortunately Camtasia makes this process pretty easy as you just have to drag and drop elements to the timeline of recording. To start the post-production process I first reviewed the recording to determine where I wanted to place my various graphic elements. Once that was complete I slowly reviewed the video and placed by navigation icons and made sure they were placed appropriately (Fig. 5).
This was done by simply dragging the items from the media bin and placing them on the timeline. Once I had them placed I wanted to make sure they had a smooth transition in the video so I used the fade in/out transition (Fig. 6).
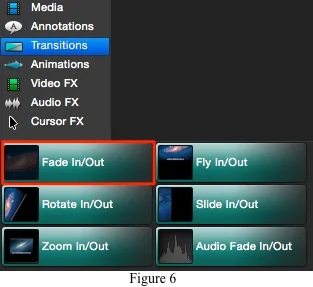
This allows the media elements to show up in the video in a more pleasing way than just abruptly appearing. In addition to the navigation icons I decided to use Camtasia’s annotations tool to add some text to the timeline as descriptors for the navigation icons (Fig. 7).
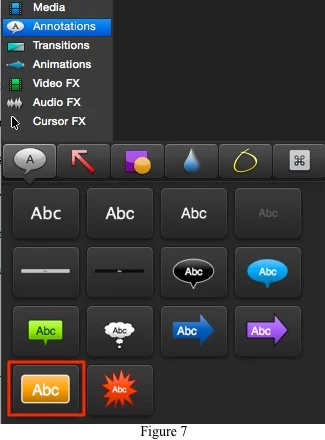
I used the same fade in/out transition on these images as well. Once I completed this post-production work I reviewed the video one last time to make sure everything was working the way I had planned. After this final review I exported the video as an .mp4 file because it is a pretty universal format for most computers and mobile devices. Once the export was complete the video was ready for a YouTube upload.